
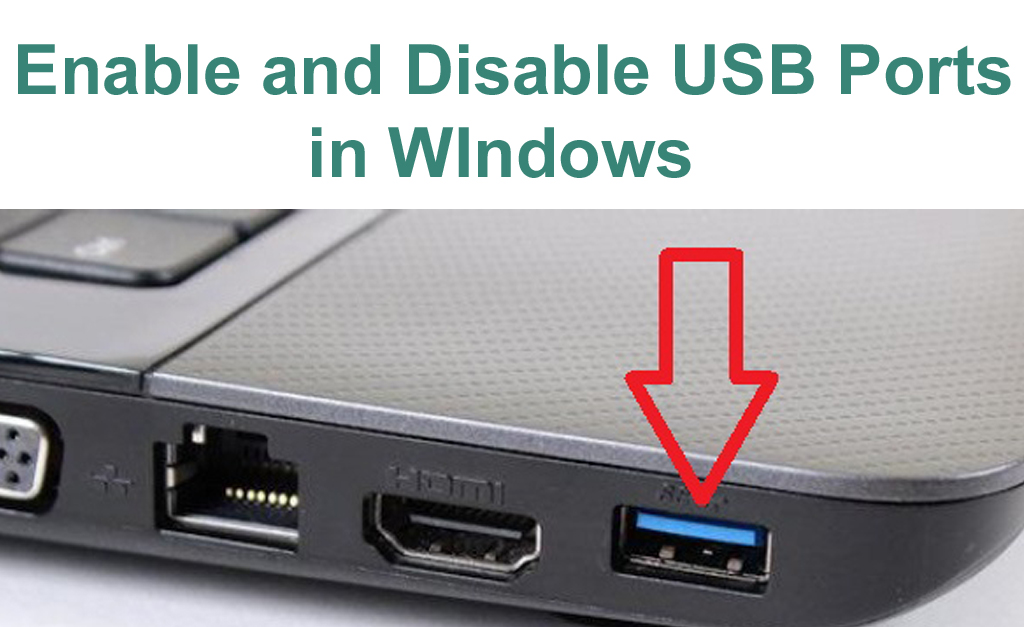
Introduction:
In the digital age, where information flows through USB connections, it’s crucial to have control over your device’s USB ports. Whether you want to enhance security or prevent unauthorized access, Windows 10 provides users with the ability to enable and disable USB ports. In this guide, we’ll walk you through the process, ensuring a smooth experience with your operating system.
Why Enable or Disable USB Ports?
Before diving into the technicalities, it’s essential to understand why you might want to enable or disable USB ports on your Windows 10 device. Security is a prime concern, and by controlling USB access, you can safeguard your system from potential threats like malware or unauthorized data transfer. Additionally, this feature can be handy in shared environments where you want to control the devices connected to your computer.
Method 1: Using Device Manager
Enabling USB Ports in Windows 10:
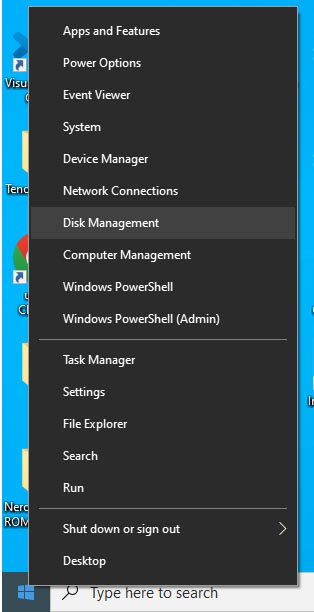
Step 1: Access Device Manager
The first step in enabling USB ports is accessing the Device Manager. Right-click on the Start button and select “Device Manager” from the menu.
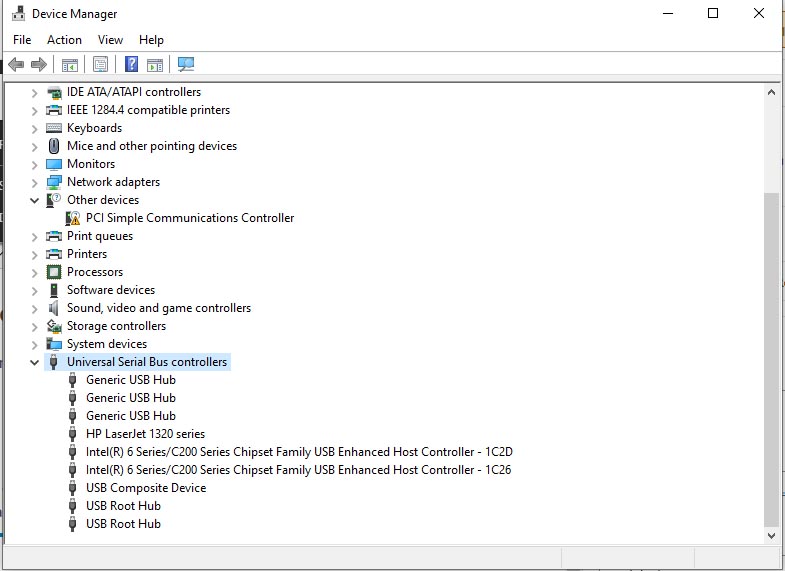
Step 2: Locate Universal Serial Bus Controllers
Within Device Manager, find and click on “Universal Serial Bus controllers.” This will display a list of USB-related components.
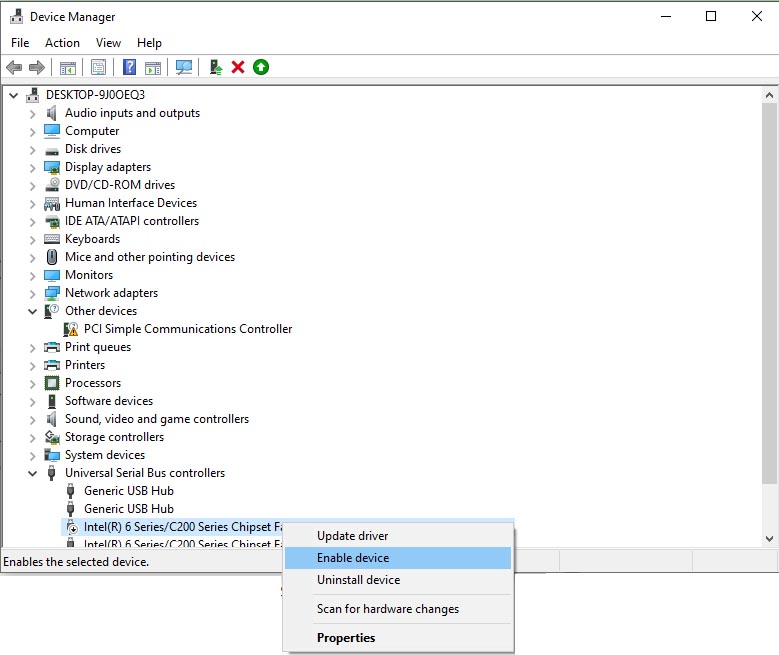
Step 3: Enable USB Ports
Right-click on the USB port you want to enable and select “Enable” from the context menu. Windows 10 will now activate the chosen USB port, allowing you to connect devices.
Step 4: Confirm Changes
To ensure the changes take effect, restart your computer. Once rebooted, your USB port should be fully enabled and ready for use.
Disabling USB Ports in Windows 10:
Step 1: Access Device Manager
Similar to enabling USB ports, begin by opening the Device Manager from the Start menu.
Step 2: Locate Universal Serial Bus Controllers
Navigate to “Universal Serial Bus controllers” within Device Manager.
Step 3: Disable USB Ports
Right-click on the USB port you wish to disable and select “Disable” from the context menu. This action will deactivate the chosen USB port, preventing any connected devices from functioning.
Step 4: Confirm Changes
Ensure the changes take effect by restarting your computer. Upon reboot, the disabled USB port should be inactive.
Method 2: Using Registry Editor to Enable or Disable USB Ports
Step 1: Access the Run Dialog Begin by opening the Run dialog box from the Start menu, or use the shortcut “Windows + R” keys.
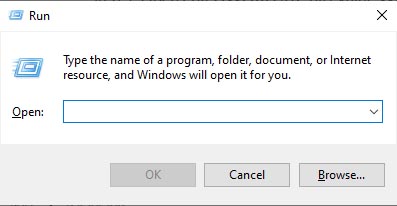
Step 2: Launch Registry Editor Type “regedit.exe” in the Run dialog box and press Enter to open the Registry Editor.

Step 3: Navigate to USBSTOR Key In the Registry Editor window, follow this path:
HKEY_LOCAL_MACHINE > SYSTEM > CurrentControlSet > Services > USBSTOR
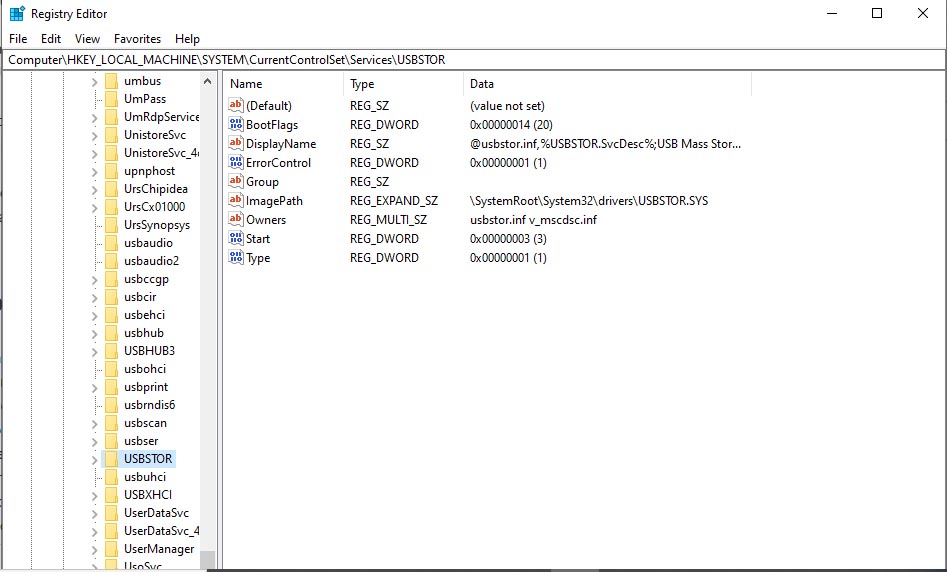
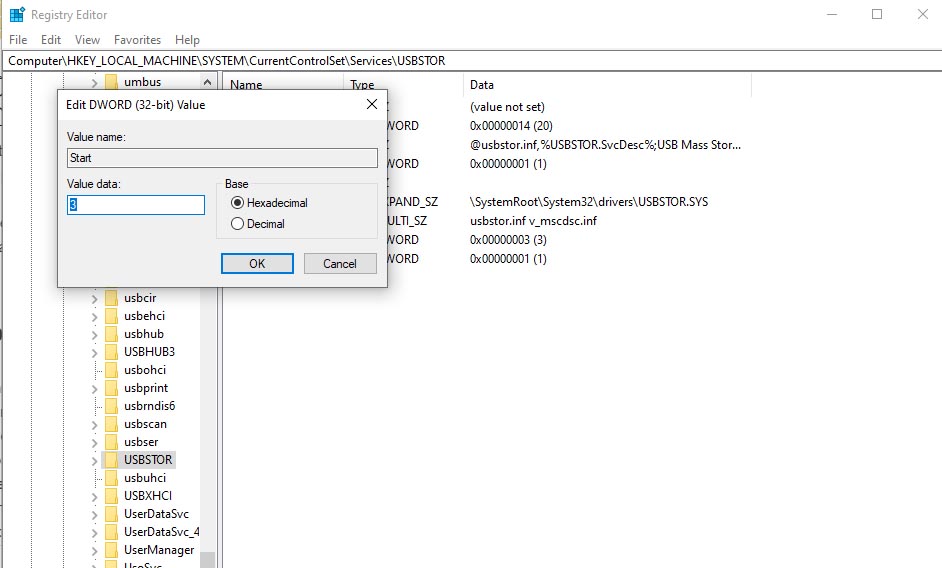
Step 4: Open Edit DWORD (32-bit) Value Window Click on the Start option to initiate the “Edit DWORD (32-bit) Value” window.

Step 5: Disable or Enable USB Ports To disable USB ports or drives, set the ‘value data’ to ‘4‘ and click OK. To enable USB drives or ports, set the value to ‘3‘ and click OK.
Step 6: Restart Your Laptop or PC To apply the changes, restart your laptop or PC and observe the effects on the USB ports.
Note: Please exercise caution while making changes in the Registry Editor, and ensure you follow these steps accurately. Incorrect modifications may impact system functionality.
Tips for Efficient USB Port Management:
- Regularly Review Connected Devices: Keep an eye on the devices connected to your USB ports. Regular reviews can help you detect any unauthorized devices promptly.
- Use Group Policies for Advanced Control: For more advanced users, Group Policies provide additional control over USB ports. Explore these settings for a more tailored approach.
- Update Device Drivers: Ensure your USB-related drivers are up-to-date. This guarantees optimal performance and compatibility with the latest devices.
- Educate Users in Shared Environments: If you share your device in a work or home environment, educate others about the importance of USB port management. Awareness is key to maintaining security.
Conclusion:
By following this guide, you’ve empowered yourself with the knowledge to control USB ports on your Windows 10 device. Whether you’re enhancing security or managing shared environments, these steps ensure you have the control you need. Stay vigilant, stay secure, and make the most of your Windows 10 experience.
Remember, a well-managed USB environment is a secure environment.