

This article explains how to add trusted websites in Windows
Introduction:
While surfing the internet, you may encounter error messages like “Your Connection is not private.” Often, it’s not the website itself that triggers these warnings but your security software or web browser, cautioning you about potential security risks.
Both Google Chrome and Microsoft Edge, for example, have built-in mechanisms to block downloads from suspicious websites. However, these browsers sometimes block websites based on their own risk assessments, which may not always align with your perception of a site’s safety. If you believe a website is safe but it’s being blocked by your browser, you can establish it as a trusted site in Windows.
In this guide, we’ll walk you through the steps to add trusted sites in Windows 10/11 and also show you how to add a website to Google Chrome’s trusted list.
How to Add Trusted Websites in Windows 10/11:
Setting up trusted sites in Windows is straightforward and involves adjustments in the Control Panel. Follow these step-by-step instructions:
- Start by searching for “Control Panel” in the Windows search bar, then open the Control Panel from the results.
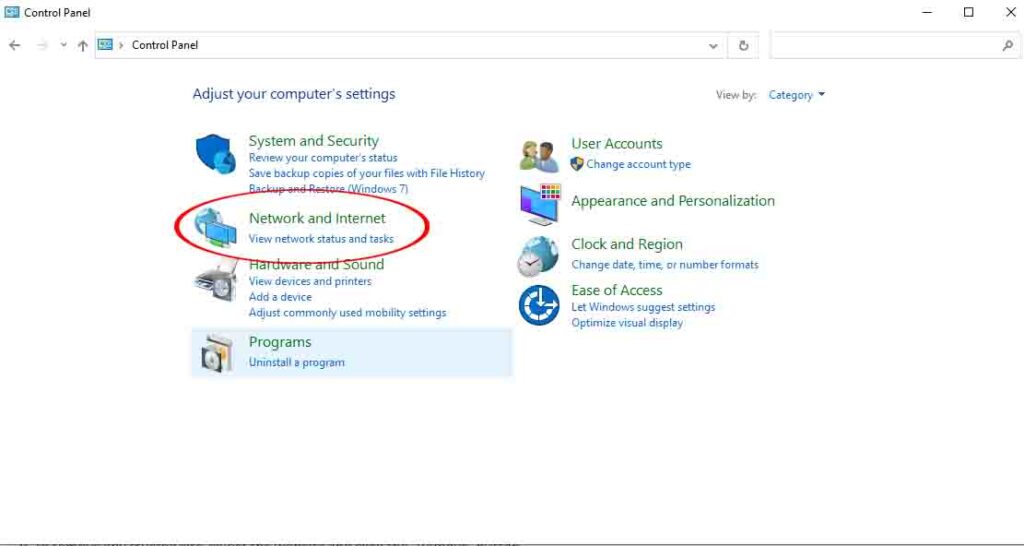
- Go to the Control Panel and select “Network and Internet.”
- Within the “Network and Internet” section, click on “Internet Options.”

- In the subsequent pop-up window, go to the “Security” tab.
- Click the “Sites” button under “Trusted sites.”
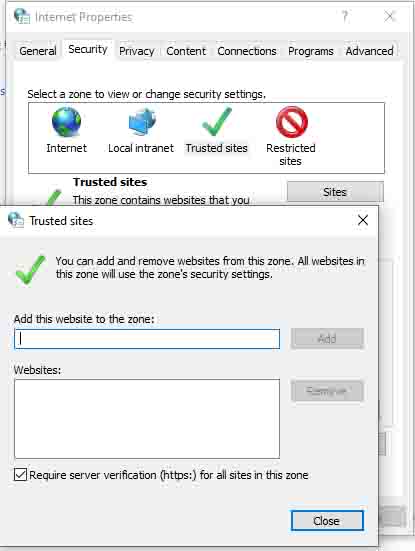
- Enter the full URL of the website you consider safe to visit, then click “Add.”
- Ensure that you uncheck the box at the bottom labeled “Require server verification for all sites in this zone.”
- Once completed, click “Close” followed by “OK.”
- To remove any trusted site, select the website and click the “Remove” button.
That’s it! You’ve successfully added trusted sites in the Windows 10/11 Control Panel.
How to Add a Website to Google Chrome’s Trusted List:
If Google Chrome blocks a website due to suspected malicious content, you can add it to Chrome’s trusted list to prevent future blockages. Follow these steps:
- Launch the Google Chrome browser.
- Visit the website you want to add to the Trusted list.
- Click on the padlock icon located before the URL.
- Go to the menu that opens and choose “Site Settings.”
- Scroll down to “Insecure Content” and click the drop-down menu, then select “Allow.”
- If you ever wish to remove the site from the trusted list, revert to the default setting by choosing “Block.”
That’s all there is to it! You’ve successfully added trusted websites to Google Chrome.
Conclusion:
This article has provided you with instructions on how to add trusted sites to the Windows 10/11 Control Panel and how to add websites to Google Chrome’s trusted list. By following these steps, you can enhance your browsing experience and ensure that you can access websites you trust without unnecessary interruptions. Please feel free to post a remark below if you need any help or have any questions. Don’t forget to share this helpful guide with your friends and colleagues.