
Creating a bootable USB drive with Rufus is a simple procedure. With Rufus, you may make bootable USB devices for a number of different operating systems, such as Windows, Linux, and others. The programme is free and open-source. Here’s a detailed tutorial on using Rufus to make a USB device that can be booted:
Note: Creating a bootable USB drive will erase all data on the USB device. Make sure to back up any important data before proceeding.
Step 1: Download Rufus
First, make sure you have the latest version of Portable Rufus. You can download it from the official website: Rufus.ie.
Step 2: Insert USB Drive
Insert the USB drive you want to make bootable into your computer’s USB port.
Step 3: Open Rufus
Run the Rufus application by double-clicking on the downloaded executable file.
Step 4: Configure Rufus Settings
- Device: In the Rufus window, select your USB drive from the “Device” dropdown menu. Ensure you’ve selected the correct drive because all data on the selected drive will be deleted.
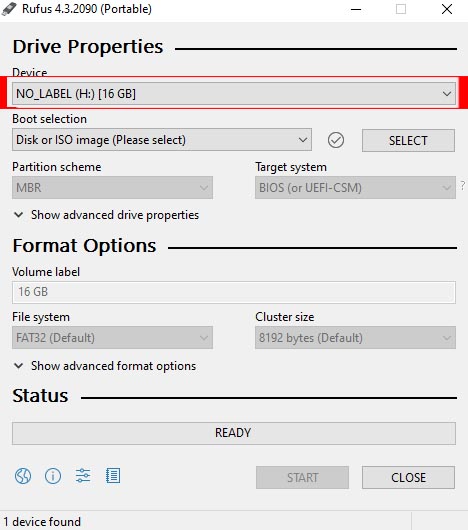
- Boot Selection: Under the “Boot selection” section, click on “Select” and browse to the ISO file of the operating system you want to create a bootable USB for. Rufus will automatically detect the necessary settings from the ISO file. I want to select windows 10 ISO File show in the figure.
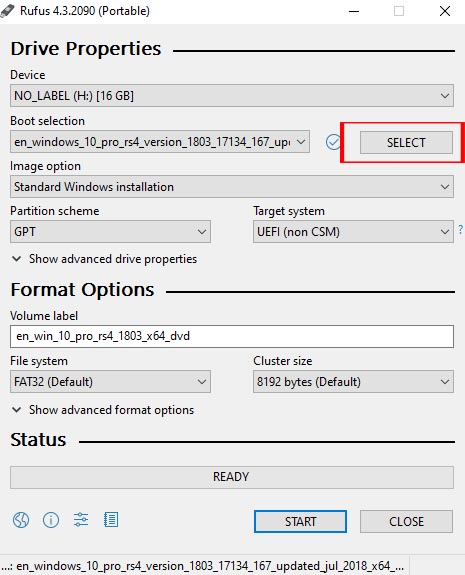
- Partition Scheme: Select the appropriate partition scheme for your computer. If you’re creating a bootable USB for a modern UEFI-based system, choose “GPT.” If your computer uses the older BIOS system, select “MBR.”
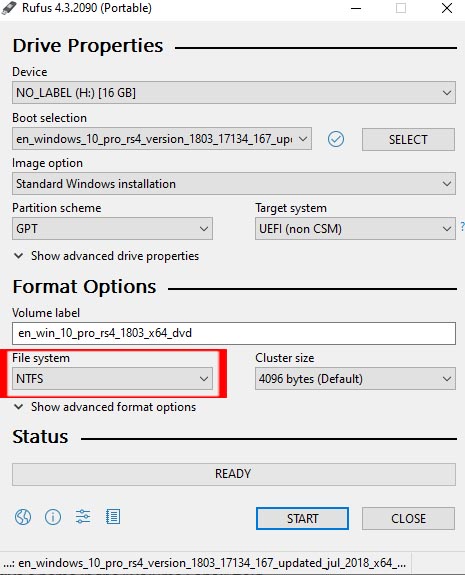
- File System: For Windows installations, it’s recommended to use “NTFS.” If you’re creating a bootable USB for Linux or other operating systems, you might want to use “FAT32.”
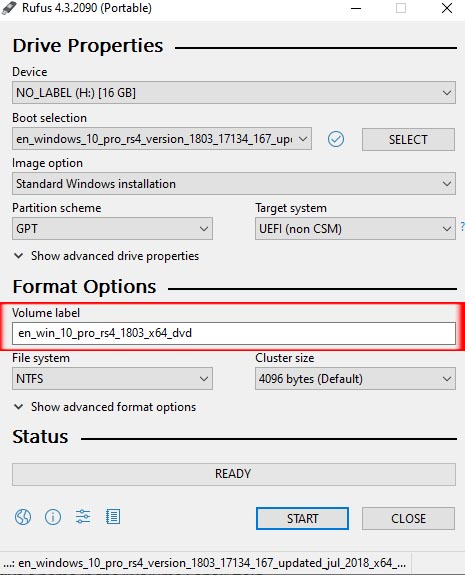
- Cluster Size: Rufus will automatically select the optimal cluster size. You generally don’t need to change this setting.
- Volume Label: You can give your bootable USB drive a name in the “Volume Label” field.
Step 5: Start the Process
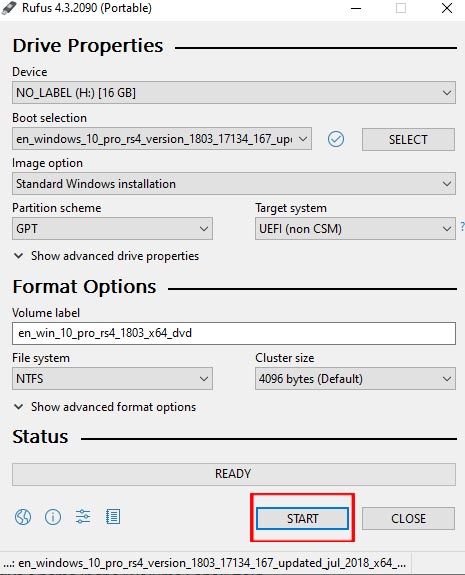
Double-check all the settings to ensure they are correct. Once you’re certain, click on the “Start” button in the Rufus window.
Step 6: Wait for Completion
Rufus will show a warning that all data on the USB drive will be destroyed. Confirm the warning, and Rufus will start creating the bootable USB drive. This process might take some time, so be patient and do not interrupt it.
Step 7: Completion and Eject
Once Rufus shows “READY” at the bottom of the window, the bootable USB drive has been created successfully. You can now close Rufus and safely eject the USB drive from your computer.
Now you have a bootable USB drive that you can use to install or repair operating systems on your computer. Remember to keep the bootable USB drive in a safe place for future use.


One Comment on “Step-by-Step Guide: Creating a Bootable USB Drive with Rufus (2023)”